Prior to September 2019, authentication for the UiPath Cloud Orchestrator REST API used Basic Authentication. Nice and simple, but starting in September of 2019, authentication for the UiPath Cloud Orchestrator REST API changed to a OAuth style scheme. Many, many users in the UiPath forum's are struggling to figure it out.
I am going to explain all the complexity in simple, precise, actionable terms that will clear up the confusion, and I am going to give you an automated tool to do all of it 100% automatically.
The officially documented process is complex, and because of its manual nature, it is very error prone. After reading this article, the data and process should be much easier!
I strongly recommend you read and study Section 2: Gotcha's when making UiPath Cloud Orchestrator REST API requests. There are many, many different configurations and situation that you might be in, and you need to know exactly what the "correct" request looks like to make sure your request matches.
If you do not really care about the details of how Authentication works, and just want a solution that generates your security information, skip to "Section 3: Deale Tech UiPathAuthentictor.js library" and read about a free javascript library that will generate all your security information with one command!
The content of this article is a combination of the official documentation, a whole lot of time and confusion on my part, and a bunch of help from @QBrandon @Loginerror from the UiPath forum.
SECTION 1: Definitive Guide to Cloud Orchestrator REST API Authentication
The "Data" and the "Process"
Lets start with some numbers and some definitions.
- There are 10 separate pieces of information that you will need to collect and manage through this process.
- 2 you already know, and
- 8 you need to generate, and record.
- There are 6 separate multi-step processes.
- The 6 processes are used in 2 different workflows:
- Generating the security data
- Making API request and refreshing the Access Token when it expires.
That is a whole lot of information to keep track of and use. Being organized is going to be important. If you lose some of the information, or are not sure which token is which, you are going to be frustrated and confused. So, lets be very organized.
The end goal of this process is to have a valid Access Token. That is used to authenticate REST API Requests. Take note that the Access Token expires every 24 hours and must be regenerated to keep using the REST API.
When I refer to codes or tokens, we are talking about text strings that can range from a few dozen characters to a few hundred characters. Do not be surprised or worried about the size of these strings. Just copy and paste them as instructed, and make very, very sure you have the whole string, and nothing but the string. Even one extra or missing character will ruin the whole process.
One note about the notation that is used in this article. There are a bunch of different "values", and a bunch of "templates" that will be presented. Any time you see something like "[CodeVerifier]" in one of these templates, that will mean you replace the string [CodeVerifier] with the text saved as your CodeVerifier property, or it will mean copy the text in that location to your CodeVerifier property.
Confusing? Do not worry. I will clear up the template and property stuff next.
In order to be organized, I have created a json template to store your security information. This template is also used by the Deale Tech UiPathAuthenticator.js library, so it is easy to move from manual to automatic operation.
The json template is stored in a file named settings.json. Fill in each property as you generate it, and everything will flow smoothly. Don't worry about what all these properties mean, that will become clear as we move through this article. Your initial settings.json file should look like the sample below. Cut and paste the json directly from this article into Notepad (Windows) or TextEdit (Mac), then fill in your username, and both passwords, and save the file.
{
    "OrchestratorUsername": "youremail@example.com",
    "AccountPassword": "your account.uipath.com password",
    "CodeChallenge": "",
    "CodeVerifier": "",
    "AuthorizationToken": "",
    "RefreshToken": "",
    "AccessToken": "",
    "IdToken": "",
    "OrchestratorAccount": "",
    "OrchestratorServiceInstance": ""
}
The end goal of this process is to have a valid Access Token. That token is passed to the UiPath Cloud Orchestrator REST API as the Bearer Token in the Headers of the GET and POST Requests.
So, we now know that we will be generating or retrieving the 8 blank properties of data through this process. The process is shown in figure 1, including the "Do Once" steps done to setup the authentication data, and the steps that have to be "redone" when the Access Token expires.

Figure 1: The Authentication Process
- The Set-up workflow is processes 1-5, done once to get started.
- The REST API Request workflow is process 5 and if you receive a HTTP Status = 401 Unauthorized, perform process 6, and retry process 5.
Note: There are alternative workflows for the second workflow (API Request Wrokflow) that can be followed when making REST API requests. Namely, when your program or script that wants to make REST API requests to Orchestrator starts, use the Refresh Token to get a new Access Token at the start of every session, and use it to make one or more REST API requests. The token is valid for 24 hours, and if your application that makes calls to the UiPath Cloud Orchestrator REST API lives for less than 24 hours, next time it runs, you simply get a new Access token.
What follows is a quick explanation of the processes at a high level, then we dive into the step-by-step instructions. Look at the picture while reading over these top level descriptions. Getting past the complexity and realizing this is a 7 process workflow will make the complexity easier.
Process 1: Generate Code Challenge and Code Verifier
This process generates a cryptographic suitable random byte array, converts it to a string named CodeVerifier, and then hashes that string using SHA256 and calls that CodeChallenge. Think of this as generating a key-pair.
You copy the [CodeChallenge] and [CodeVerifier] into settings.json.
Process 2: Generate Authorization Code
In this process, you make a GET request to present your [CodeChallenge] to the https://account.uipath.com/authorize endpoint. When you do that, you are prompted to interactively log into your accounts.uipath.com account, which then redirects you to a page and URL that have the [AuthorizationCode].
You copy the [AuthorizationCode] into the settings.json file
Process 3: Generate Initial Tokens
In this process, you POST to https://account.uipath.com/oauth/token with the [CodeVerifier] and the [AuthorizationCode], and get back three tokens;
- [RefreshToken]: Used to generate a new API Access Token when your current API Access Token expires, by generating a new Access Token.
- [AccessToken]: The Token used to make authenticated UiPath Cloud Orchestrator REST API requests.
- [IdToken]: This one is curious. It is used with the account.uipath.com endpoints in Process 4, and can be used to retrieve data about your account, such as the logical account name, and the logical service name. These names are used in the URL endpoints of the UiPath Cloud Orchestrator REST API.
Update: 2019-11-26: I am updating the blog with some additional information here. The AccessToken and the IdToken are both JSON Web Tokens (JWT) that encode information about you. To read about JWT see https://en.wikipedia.org/wiki/JSON_Web_Token. You can also decode your AccessToken and IdToken here: https://jwt.io/. You cut and paste the entire token into this web site to see the encoded information.
Process 4: Discover UiPath Account and Service Instance Identifiers
This process is looking up information from your platform.uipath.com account. That information is used in REST endpoints in the URL, and as the tenancyName in request headers.
Process 5: Making your API Requests
This is not really a single step. Now that you have the [AccessToken], you can use it as your bearer token in the Authentication header in as many API requests as you want. I have not tested, but presumably, you can have this token on multiple computers making API calls at the same time, or generate security data for each computer, and have multiple valid Access Tokens, one for each computer.
The Access Token expires after 24 hours
When the Access Token expires, you will receive a HTTP Status = 401 - Unauthorized. That means you need to perform step 6 to refresh the [AccessCode].
Process 6: Refresh your Access Token
When you get HTTP Status = 401, it is time to execute process 6.
In this process you use the [RefreshToken] to generate a new [AccessToken]. Use the new [AccessToken] and retry your API Call.
Detailed instructions for each step
- These instructions are openly copied from UiPath's official documentation and modified based on many hours of experimentation. This should be a clear, easy (easier?) to follow set of instructions.
Process 1: Generate Code Challenge and Code Verifier
Notes:
- You will perform this process once. It is set-up.
- You can re-run this process, but that requires you to rerun all the processes that follow.
- These codes are generated on the repl.it server, and should be totally portable around your computer infrastructure.
Steps:
- In a web browser window, go to https://repl.it/languages/nodejs.
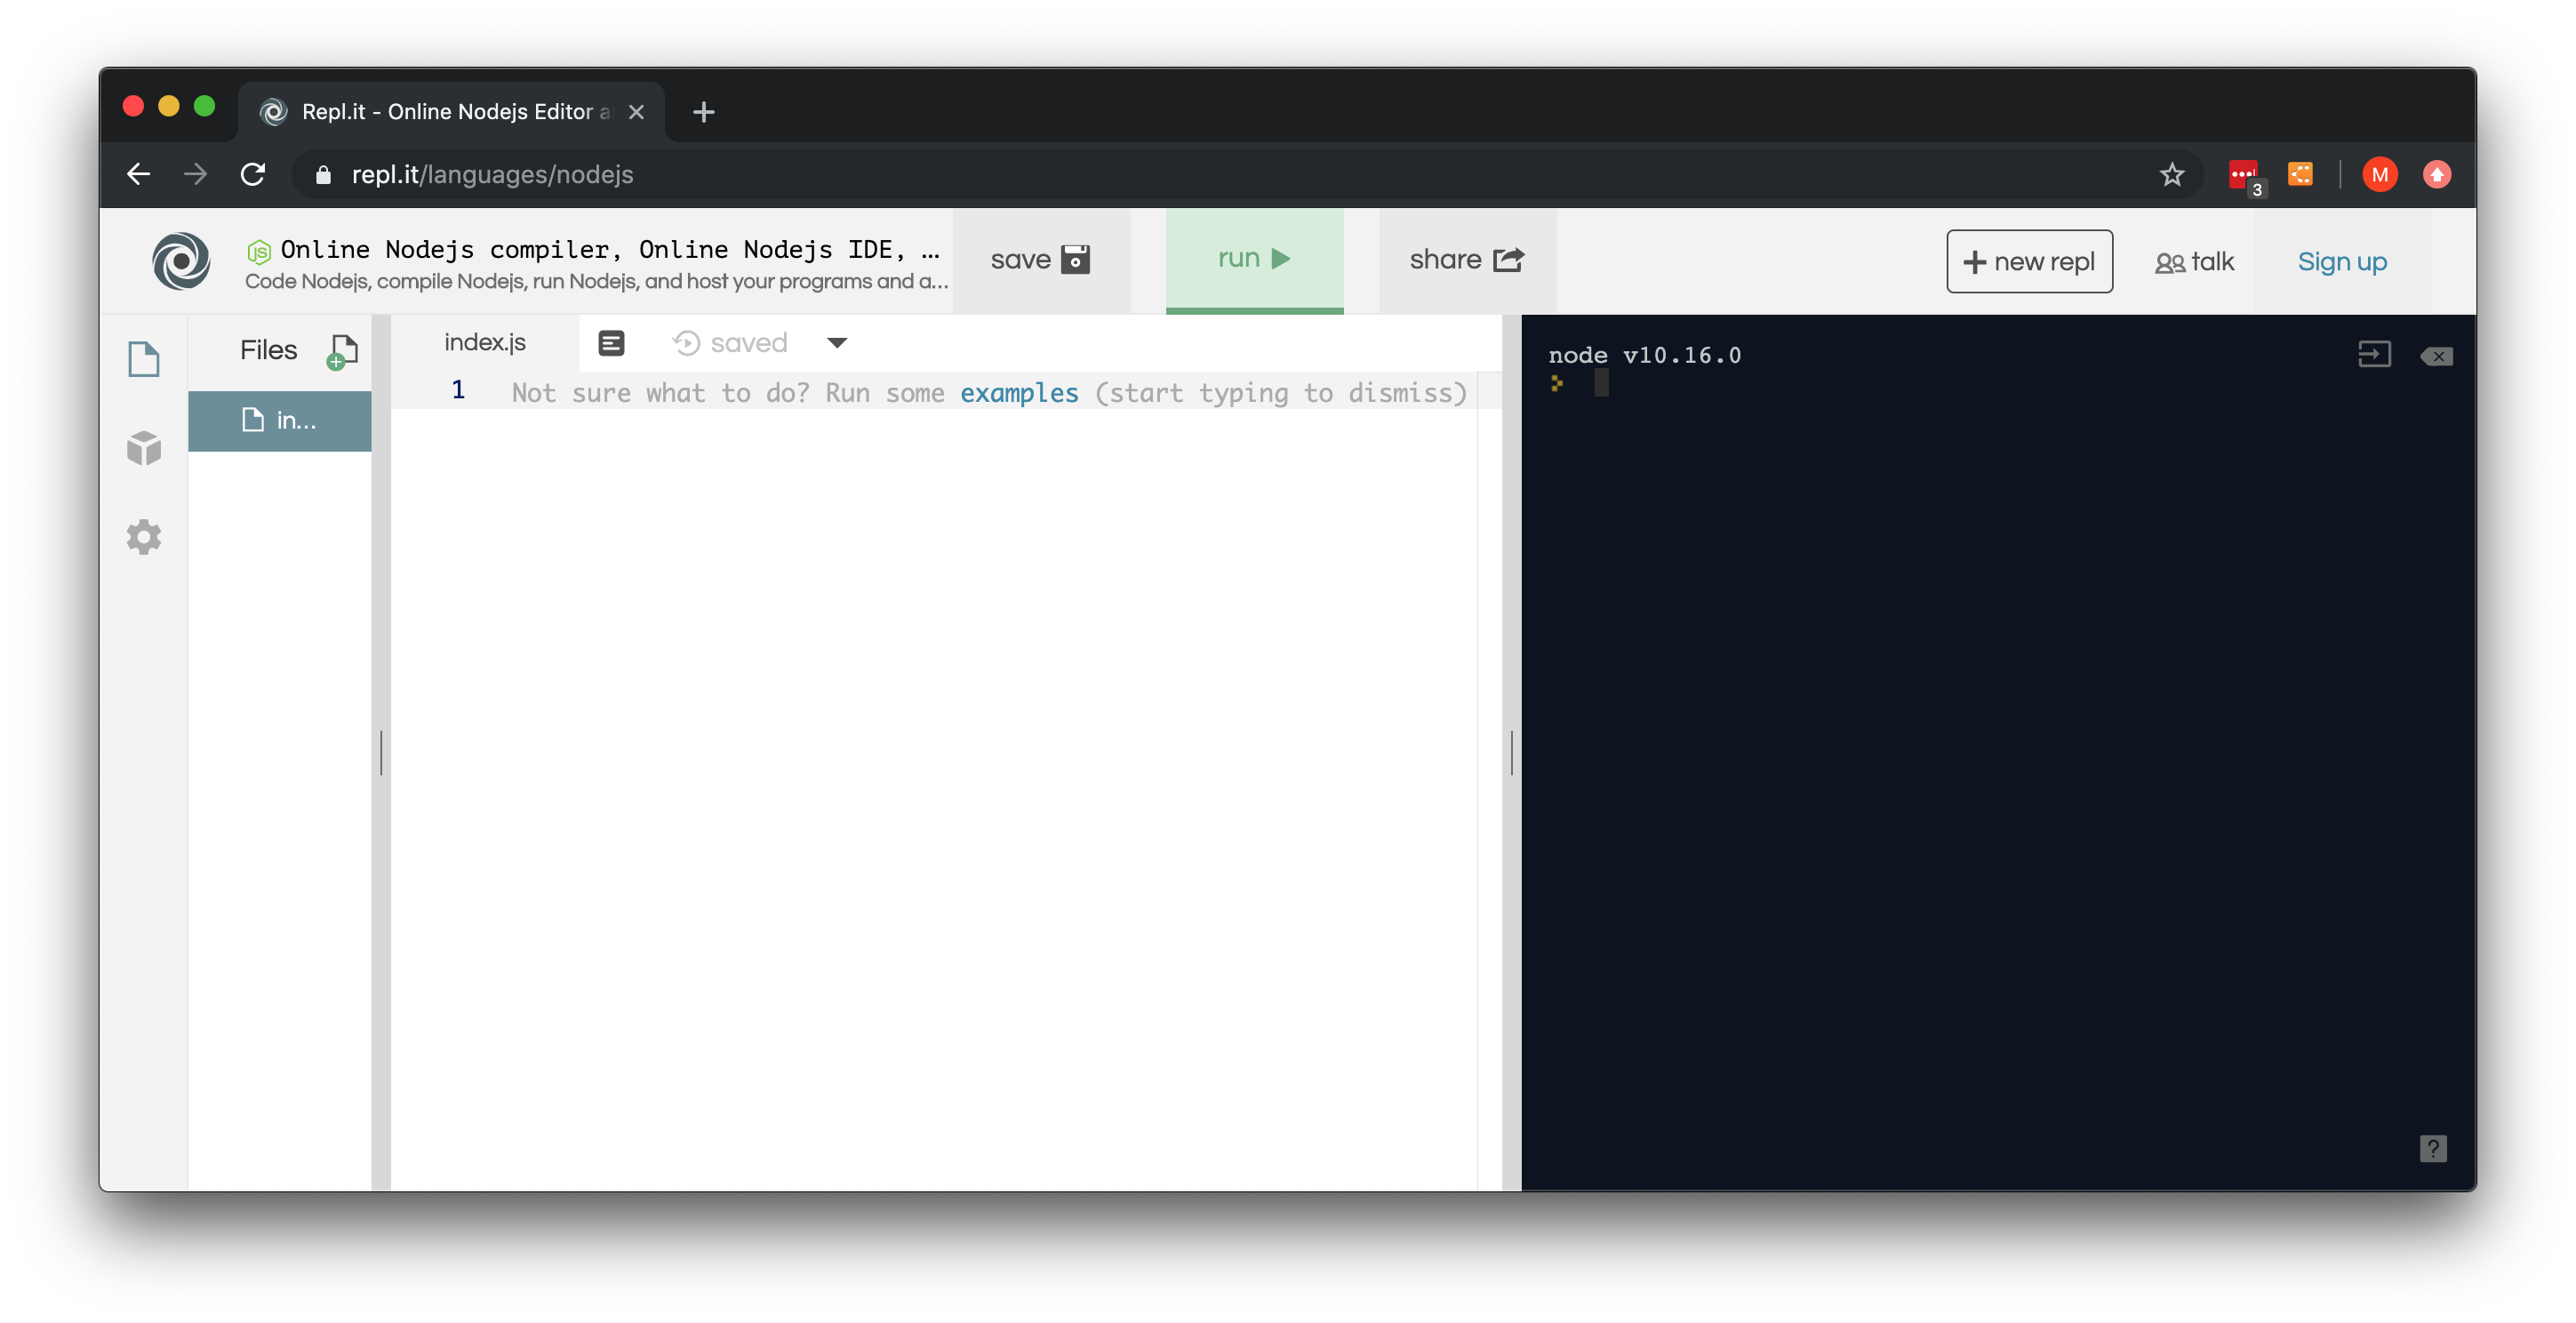
Figure 2: repl.it
- Paste the following code in the index.js file in repl.it:
var crypto = require('crypto');
function base64URLEncode(str) {
return str.toString('base64')
.replace(/\+/g, '-')
.replace(/\//g, '_')
.replace(/=/g, '');
}
function sha256(buffer) {
return crypto.createHash('sha256').update(buffer).digest();
}
console.log("Generating challenge and Verifier");
var cryptoResult = crypto.randomBytes(32);
var verifier = base64URLEncode(cryptoResult);
var challenge = base64URLEncode(sha256(verifier));
console.log("Code challenge: " + challenge)
console.log("Code verifier: " + verifier);
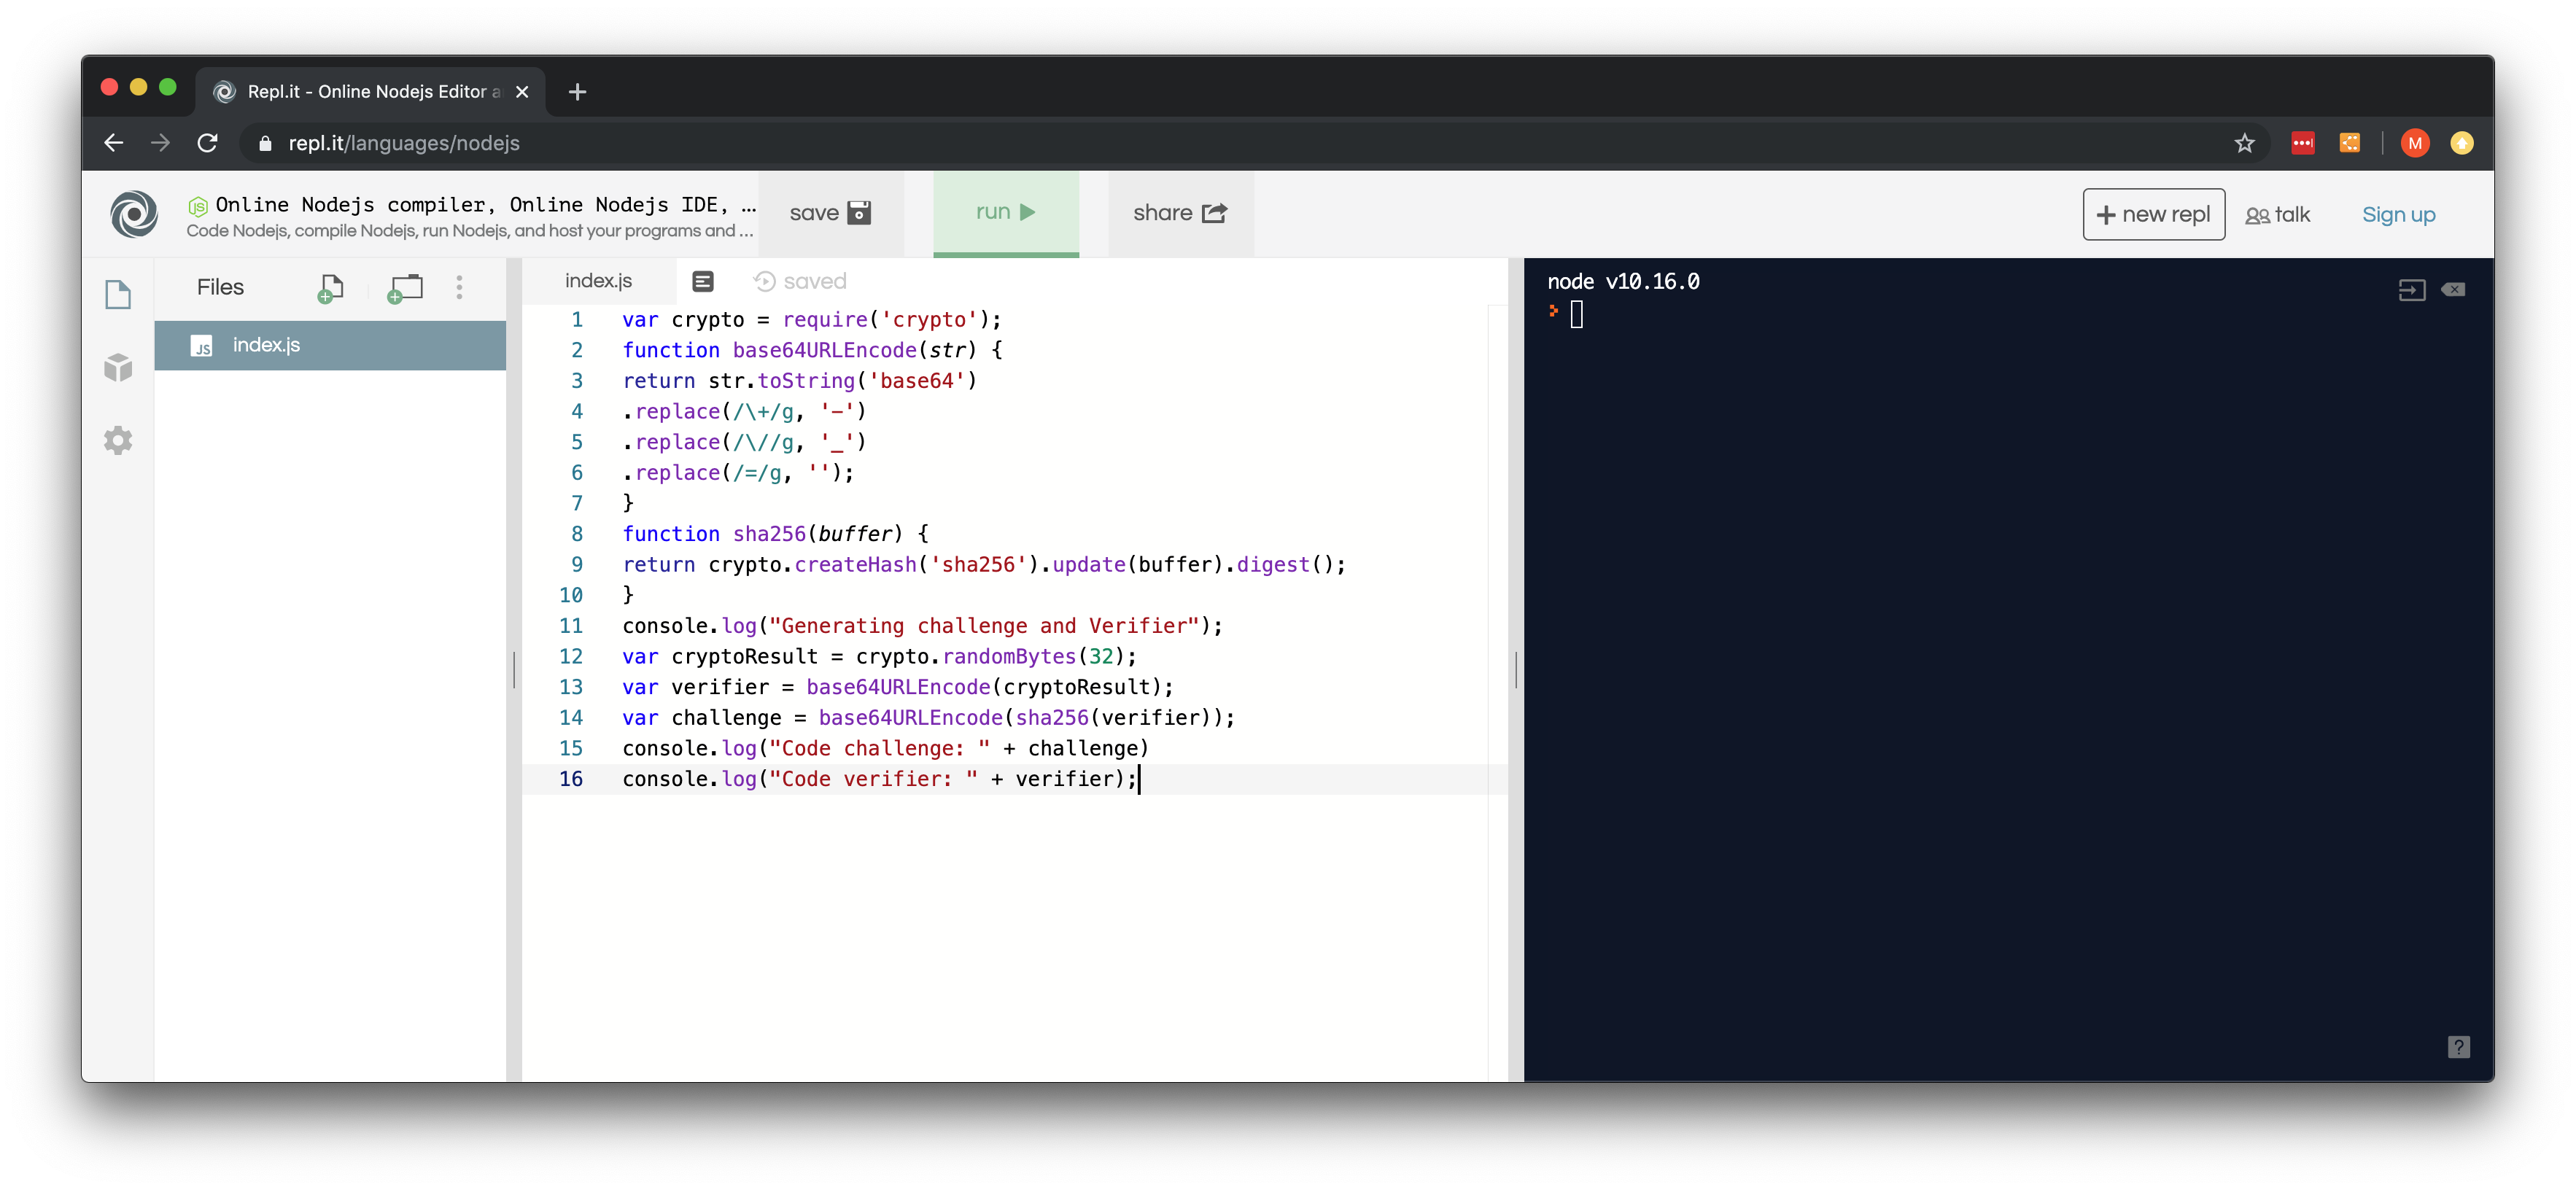
Figure 3: With Javascript Code
- Click Run on the top of the page. The output should look like this:
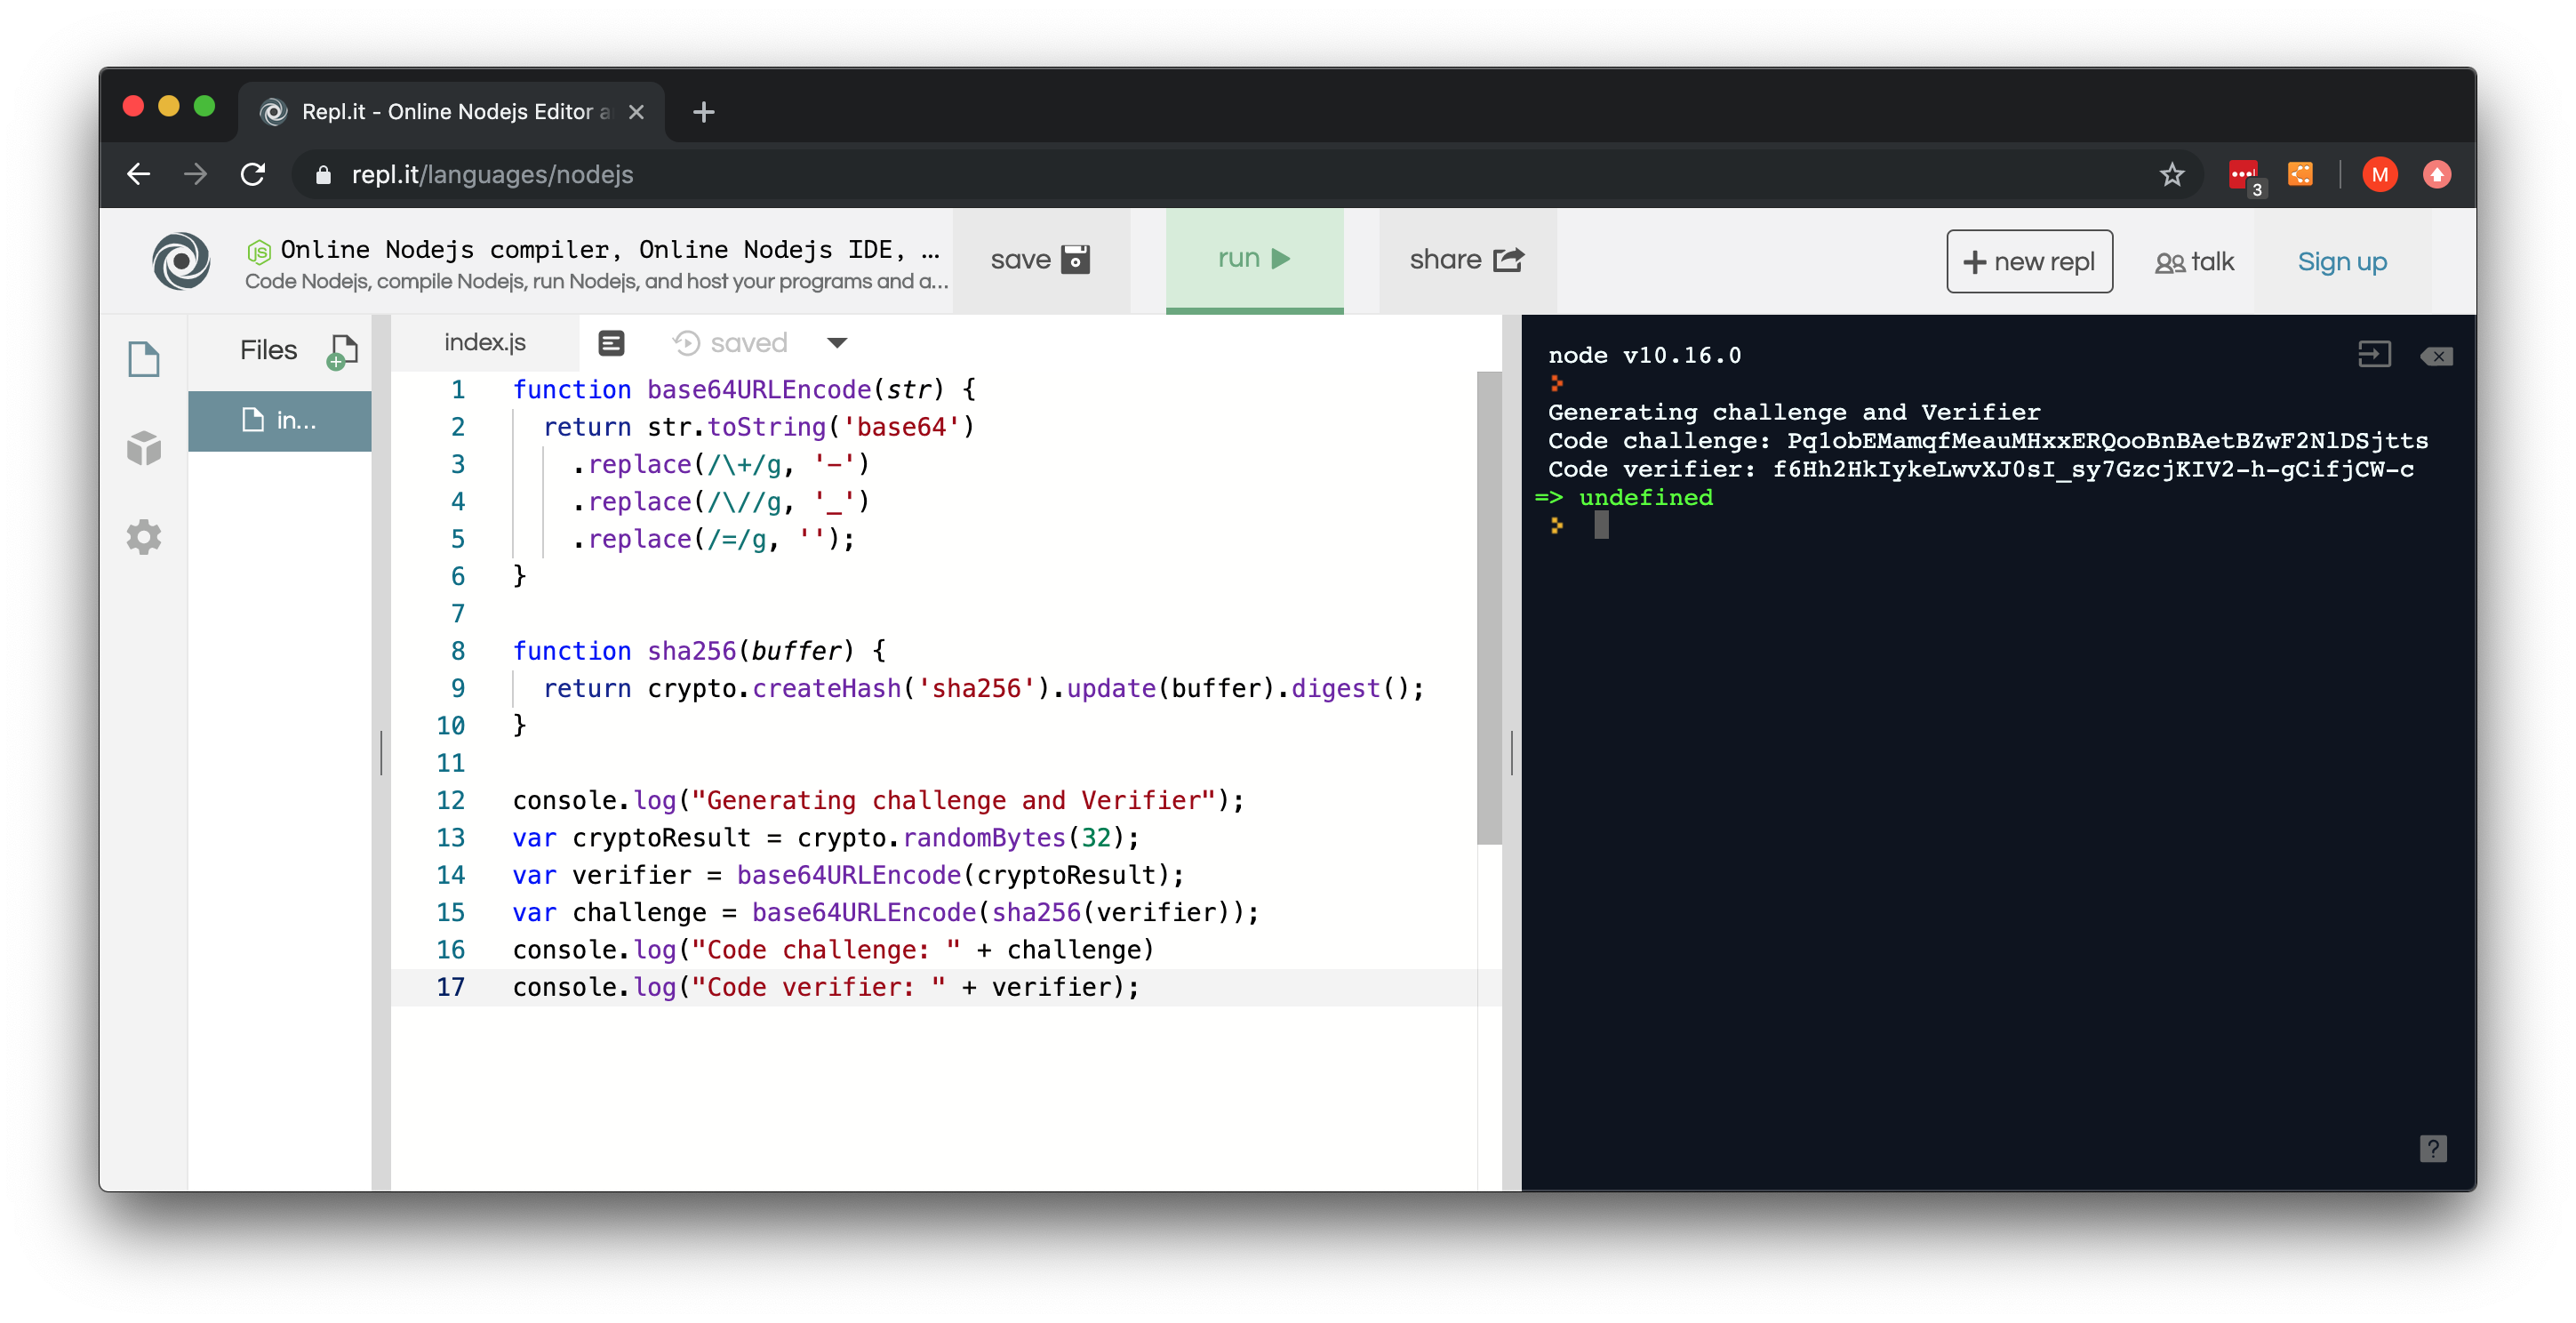
Figure 4: CodeChallenge and CodeVerifier are Computed
- Save the [CodeChallenge] and [CodeVerifier] to the correct properties in the settings.json file
Process 2: Generate Authorization Code
Notes:
- You must use the entire URL. When step 1 and 2 say copy the URL, they mean it. The whole thing.
- The credentials in step 6 below are for account.uipath.com. If you cannot log in, go to account.uipath.com. What ever password you use there, is what you use in step 6.
Steps:
- Copy the following URL in a text editor, such as Notepad:
https://account.uipath.com/authorize?response_type=code&nonce=b0f368cbc59c6b99ccc8e9b66a30b4a6&state=47441df4d0f0a89da08d43b6dfdc4be2&code_challenge=[CodeChallenge]&code_challenge_method=S256&scope=openid+profile+offline_access+email&audience=https%3A%2F%2Forchestrator.cloud.uipath.com&client_id=5v7PmPJL6FOGu6RB8I1Y4adLBhIwovQN&redirect_uri=https%3A%2F%2Faccount.uipath.com%2Fmobile - Replace [CodeChallenge] with your Code challenge generated in step 3 of process 1.
- Copy the updated URL.
- Open a web browser window.
- Paste the updated URL into the address bar, and press Enter. You are redirected to a UiPath Login page.

Figure 5: UiPath Login
- Login using your credentials.
- The browser's Text window shows OK, with the URL in the following format:
https://account.uipath.com/mobile?code=[AuthorizationCode]&state=47441df4d0f0a89da08d43b6dfdc4be2
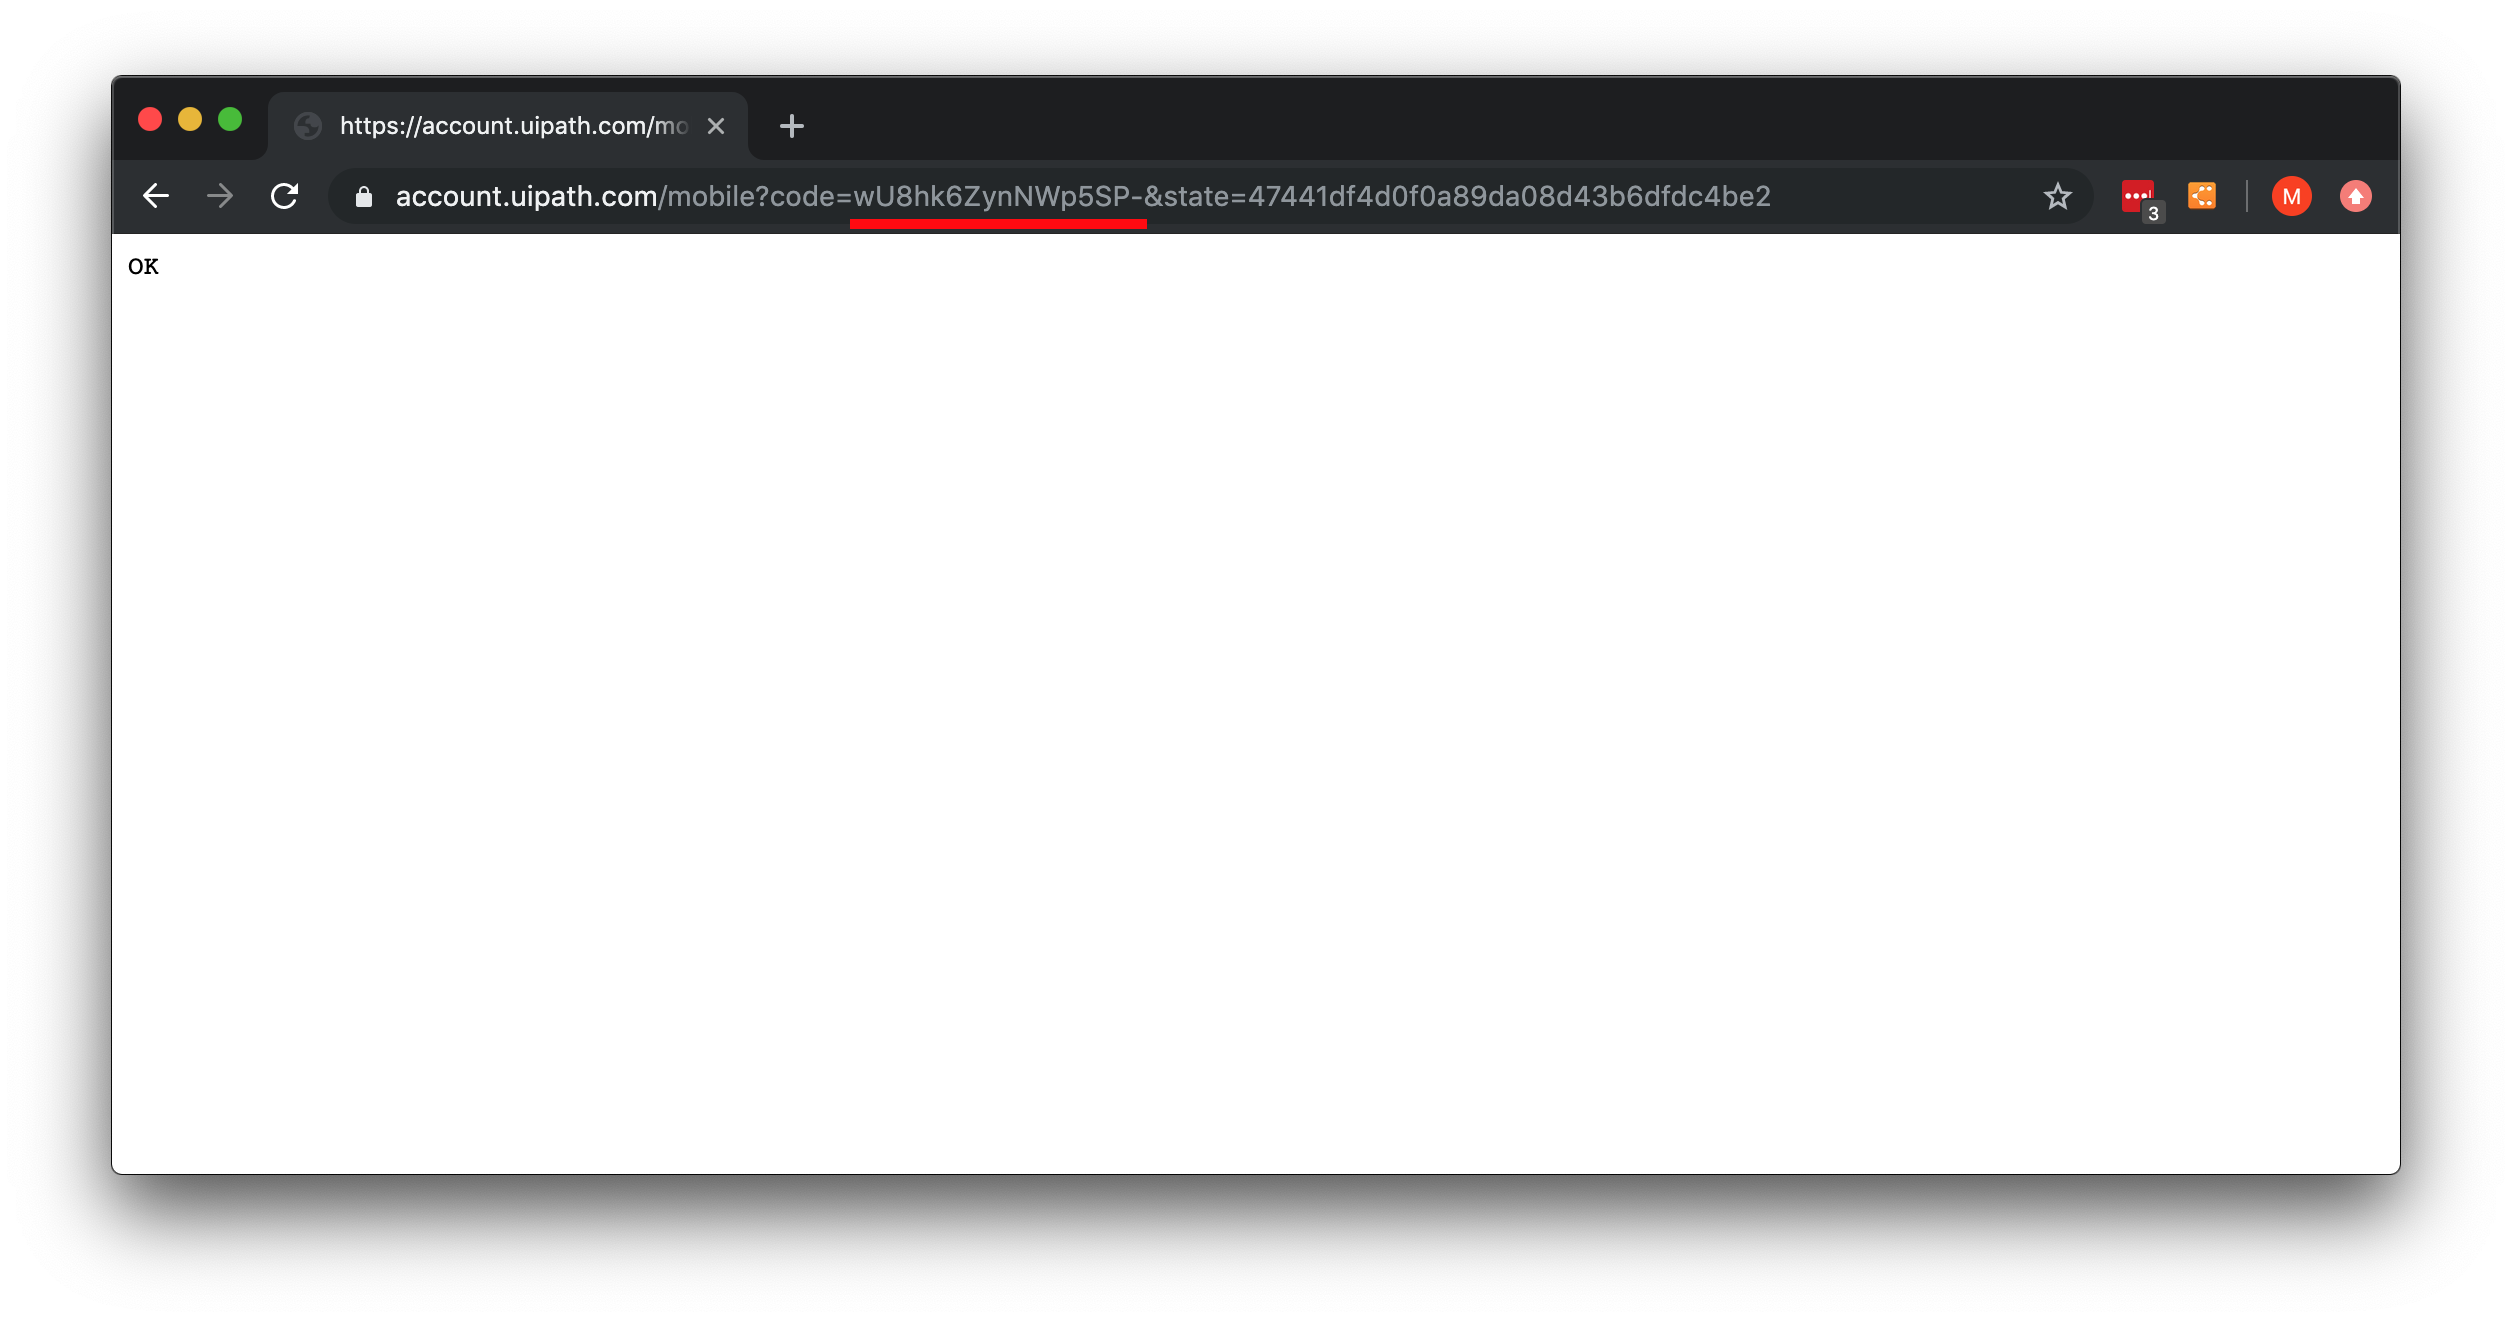
Figure 6: The Authentication Process
- Copy this [AuthorizationCode] to the settings.json file.
Process 3: Generate Initial Tokens
Notes
- In the Body of the post, the values for the properties grant_type, redirect_uri, and client_id must be included exactly as shown.
- The refresh, access, and id tokens are very long strings. Make sure to copy the whole string, and nothing else.
Steps:
- In any API testing tool, perform a POST request to the https://account.uipath.com/oauth/token URL. In the body of the request, replace [Authorization code] and [Code verifier] with the values received in the two procedures above. The request and response should look as in the following example:
POST https://account.uipath.com/oauth/token ;
Headers
{
        Content-Type: application/json
}
Body
{
    "grant_type": "authorization_code",
    "code": "[AuthorizationCode]",
    "redirect_uri": "https://account.uipath.com/mobile",
    "code_verifier": "[Code verifier]",
    "client_id": "5v7PmPJL6FOGu6RB8I1Y4adLBhIwovQN"
}
Response
Content-Type: application/json
{
  "access_token": "[AccessToken]",
  "refresh_token": "[RefreshToken]",
  "id_token": "[IdToken]",
  "scope": "openid profile email offline_access",
  "expires_in": 86400,
  "token_type": "Bearer"
}- Copy the [AccessToken], [IdToken] and [RefreshToken] from the response body to the settings.json file
Process 4: Discover UiPath Account and Service Instance Identifiers
Notes:
- The [AccountLogicalName] and the [ServiceLogicalName] are two pieces of information that are used to compose REST API URL's. For example, if you want to retrieve your license information from the Orchestrator REST API the URL is below.
The [ServiceLogicalName] is also used as the TenantName in the headers of requests.
Steps:
Getting Account Logical Name
- In any API testing tool, perform a GET request to https://platform.uipath.com/cloudrpa/api/getAccountsForUser. You need to use Authorization header with your Bearer Token, pasting the [IdToken] from settings.json. The request and response should look as in the following example:
GEThttps://platform.uipath.com/cloudrpa/api/getAccountsForUser
Headers
{
   Authorization: Bearer [id_token]
}
Body
Empty
Response
{
  "userEmail": "[user_email]",
    "accounts": [
        {
            "accountName": "[account_name]",
            "accountLogicalName": "[account_logical_name]"
        }
    ]
}- Copy [AccountLogicalName] into the settings.json property, and save the file.
Getting Service Logical Name
- In any API testing tool, perform a GET request to https://platform.uipath.com/cloudrpa/api/account/[AccountLogicalName]/getAllServiceInstances. You need to use Authorization header with your Bearer Token, pasting the [IdToken] and [AccountLogicalName] values from settings.json into the URL. The request and response should look as in the following example:
GEThttps://platform.uipath.com/cloudrpa/api/account/[account_logical_name]/getAllServiceInstances
Headers
{
   Authorization: Bearer [id_token]
}
Body
Empty
Response
[
    {
        "serviceInstanceName": "[service_instance_name]",
        "serviceInstanceLogicalName": "[ServiceLogicalName]",
        "serviceType": "ORCHESTRATOR",
        "serviceUrl": "[service_url]"
    }
]- Copy [ServiceLogicalName] into settings.json, and save the file.
Process 5: Making your API Requests
Notes:
- The Access Token expires after 24 hours. If you get HTTP Status = 401 - Unauthorized. That means you need to refresh the [AccessToken] as described below in process 6.
- The process for GET, POST, PUT, DELETE, etc are identical from the point of view of authorization. It is up to you to find the proper URL, and format the Body, if required.
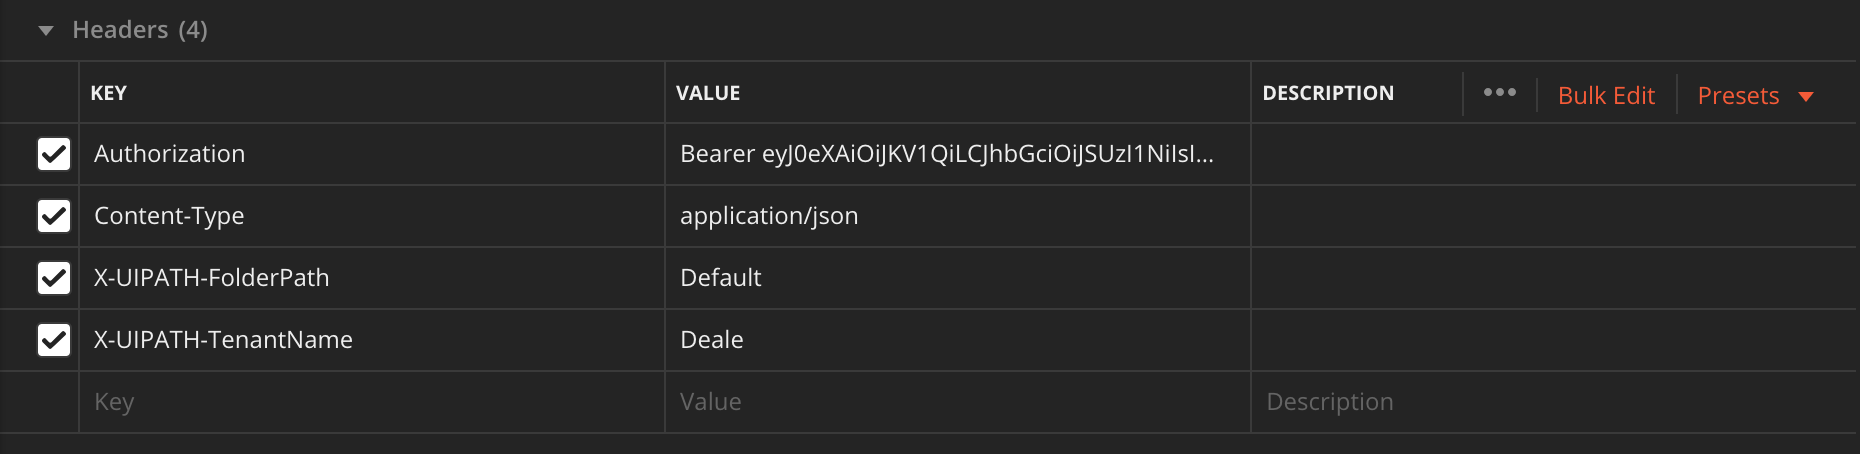
- Much of the confusion stems from not supplying the correct headers. You will supply 4 headers to all UiPath Cloud Orchestrator REST API requests. Failure to supply one of the headers will result in a failed request.
- This example shows using the AddQueueItem REST API request to add a QueueItem to a named Queue. In the example, we use the queue named "InHouse_Process4", and place a WIID property with Value '12345' in the SpecificContent. Note that the ServiceLogicalName is supplied both in the URL and in the TenantName header.
Steps:
- In any API testing tool, perform a POST request to https://platform.uipath.com/[AccountLogicalName]/[ServiceLogicalName]/odata/Queues/UiPathODataSvc.AddQueueItem. The header will use the API Access Token as the Authentication Bearer Token, and put the queue item data in the body. The request and response should look as in the following example:
POSThttps://platform.uipath.com/Deale/Deale/odata/Queues/UiPathODataSvc.AddQueueItem
Headers
{
"Authorization": "Bearer [APIAccessToken]",
"Content-Type": "application/json",
"X-UIPATH-FolderPath": "Default",
"X-UIPATH-TenantName": "Deale"
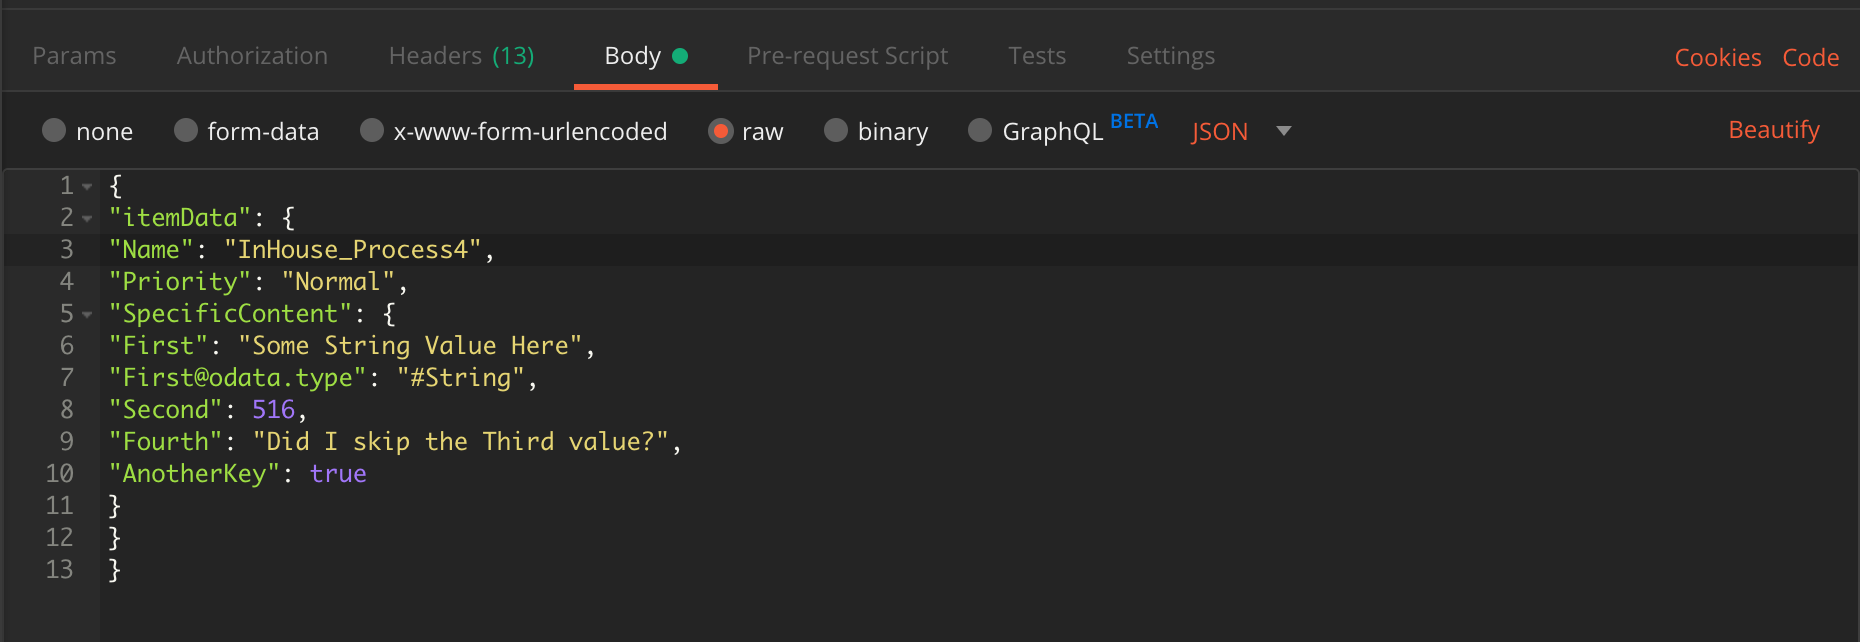
}Body
{
    "itemData": {
        "Priority": "Normal",
        "Name": "InHouse_Process4",
        "SpecificContent": {
            "WIID": "12345"
        }
    }
}
Response: Status = 201 Created
{
    "@odata.context": "https://platform.uipath.com/odata/$metadata#queueItem/$entity",
    "QueueDefinitionId": 269295,
    "OutputData": null,
    "AnalyticsData": null,
    "Status": "New",
    "ReviewStatus": "None",
    "ReviewerUserId": null,
    "Key": "2eb82b78-f6cd-44e6-abf0-c9edd312465f",
    "Reference": null,
    "ProcessingExceptionType": null,
    "DueDate": null,
    "RiskSlaDate": null,
    "Priority": "Normal",
    "DeferDate": null,
    "StartProcessing": null,
    "EndProcessing": null,
    "SecondsInPreviousAttempts": 0,
    "AncestorId": null,
    "RetryNumber": 0,
    "SpecificData": "{\"DynamicProperties\":{\"WIID\":\"Michael's Test\"}}",
    "CreationTime": "2019-10-17T18:13:21.9367332Z",
    "Progress": null,
    "RowVersion": "AAAAAAQL+ME=",
    "Id": 25291661,
    "ProcessingException": null,
    "SpecificContent": {
        "WIID": "Michael's Test"
    },
    "Output": null,
    "Analytics": null
}- Log into platform.uipath.com, navigate to your InHouse_Process4 queue, and look at the queue items. There will be a new queue item, with WIID = 12345.
Process 6: Refresh your API Access Code
Notes:
- You will know it requires a refresh when you get 401 - Unauthorized back from an API Request that is otherwise valid.
- The Deale Tech API Authorization library has HTTP Verb methods (AuthorizedGet, AuthorizedPost, etc.) that automatically refresh your API Access Token when a request receives a 401 response from the server. For more details, see the second section of this article.
- The refresh process is a simple process:
- Generate a new [AccessToken] using the [RefreshToken].
- Use the new [AccessToken] in all subsequent REST API Calls, until it expires.
Steps:
- Refresh the Access Token, using your [RefreshToken] by making the following POST request:
POSThttps://account.uipath.com/oauth/token
Headers
{
   "Content-Type": "application/json",
}
Body
{
    "grant_type": "refresh_token",
    "client_id": "5v7PmPJL6FOGu6RB8I1Y4adLBhIwovQN",
    "refresh_token": "[refresh token]"
}
Response: Status = 201 Created
{
  "access_token": "[access token]",
  "id_token": "[id token]",
  "scope": "openid profile email offline_access",
  "expires_in": 86400,
  "token_type": "Bearer"
}- Save the new [IdToken] and [AccessToken] in settings.json.
Final thoughts on how to use all of this in production
If you look at the process picture in figure 1, you realize that each client computer making Cloud Orchestrator REST API calls will require 4 pieces of information stored locally in order for the authentication scheme to work:
{
    "RefreshToken": "",
    "AccessToken": "",
    "LogicalAccountName": "",
    "OrchestratorServiceInstance": ""
}
The workflow described in this section (and the official Orchestrator documentation) describes a manual process to generate the Access Token. Clearly this will not work in production. A person cannot be involved in recreating the API Access Token when it expires for an automated REST API request. The refresh must be automated.
Your script that is making Cloud Orchestrator REST API requests will need to catch 401 - Unauthorized responses, and automatically re-generate the Access Token.
SECTION 2: Gotcha's when making UiPath Cloud Orchestrator REST API Calls
In the process of understanding UiPath Cloud Orchestrator REST API Authentication, I made many many wrong turns, mistakes and flat out blunders. Many of these are because the Cloud Orchestrator is different depending on when your "instance" was created. The information about making a REST API request was also a bit confusing and spread out. Miss one thing and you fail.
The issue boils down to this. UiPath tried to be nice to all of us. Instead of switching the Authentication Scheme from Basic Auth to an OAuth style scheme in one release, they decided to add the OAuth scheme (Around March 2019?), and leave the Basic Auth Scheme running. Of course,that also leads to confusion. I have been told Basic Auth will be removed in a near term release (That information was provided in Mid November 2019)
Based on what I have been told by UiPath folks:
- Around September 2019, all new instances should ONLY have OAuth.
- If your instance was created prior to September 2019, you will be able to use Basic Auth and the OAuth style.
At about the same time (September 2019) Folder's were added to the UiPath Cloud Orchestrator, and the REST API now needs folder information when looking up various objects. Folders are a replacement for the older OU Active directory style of organizing your objects.
The major differences between Basic Auth / Older Service Instances and OAuth / New Service Instances are as follows
With Basic Auth
- You use TenantName, Username and Password to retrieve a Access Token.
- Use the Access Token to make requests with URL's formatted as https://platform.uipath.com/odata/...
- Provide the Access Token as the Bearer Token in the header
- Provide the OU Information in a header.
With OAuth
- Use a OAuth stlye process to generate a Refresh Token once.
- Use the Refresh token to generate an Access Token
- Use the Access Token to make requests with URL's formatted as https://platform.uipath.com/[LogicalAccountName]/[ServiceInstanceName]/odata/...
- Provide the Access Token as the Bearer Token in the header
- Provide the X-UIPATH-TenantName header with the ServiceInstanceName as the value
- Provide the X-UIPATH-FolderPath header with the folder the resources are located inside. Use 'Default' as the value if you are not using folders.
Now, this can all be a bit tricky, because, if your Instance was created before September 2019, you can mix and match some of these. For example, you can use the OAuth Access Token, but omit the LogicalAccountName and Serivce InstanceName from the URL, and the request works just fine.
That said, I have been advised by UiPath, that willnot be the case for long. go ahead and start using your AccountName and ServiceName in the URL's to make sure you work when the final cut-over to OAuth happens.
Lastly, the example below is screen shots from Postman of a working UiPath Cloud Orchestrator REST API request. If yours looks like this and doesn't work, please let me know. There are probably plenty of things about this process that I have not learned!

SECTION 3: Deale Tech UiPathAPIAuthenticator.js library.
I very quickly realized that all these issues created lots of confusion. Being a Software Engineer, I decided to build a library to automate all of this. Instead of manually generating information and coding requests yourself, you can use the Deale Tech NodeJS based library, just like I shall do for my clients.
Motivation
Deale Tech (My UiPath consulting company) has a client who will modify their proprietary Desktop Application written in FileMaker Pro to add a button that calls a script which posts transaction data to an Orchestrator Queue for processing by an Unattended Robot.
Because I need a script to handle this requirement in a general and reusable manner, I decided to write a reusable library.
The idea is simple. Have a library that performs two basic functions:
- Automatically create the security information required, and save it in settings.json
- Perform HTTP requests that automatically refresh the security tokens when they expire.
The Deale Tech UiPathAPIAuthenticator.js library does both those things.
System Requirements / Installation
To use the UiPathAPIAuthenticator.js library, you will need:
-
Node for Mac or Windows - Current LTS release: v10.16.3, but it should work with older and newer releases of node.
-
Google Chrome
-
The UiPathAPIAuthenticator library directory, which includes all required packages (All created when you unzip the library).
-
Your starting configuration information:
- Your Orchestrator username (email),
- Account.uipath.com password,
- Platform.uipath.com password,
- Path to Google Chrome executable.
-
Internet access from the computer or VM running the library.
Library Folder Organization
The Deale Tech UiPathAPIAuthenticator.js library is delivered as a zip file. It will be published as a NPM in the future. Pick a folder, and unzip its contents. This root folder will be referred to as {library root} in this article. The UiPathAPIAuthenticator.js library is organized into a number of sub folders inside the {library root} folder.
- lib: Where the library code is stored.
- config: Where the settings.json file is stored, along with sample starting files for Mac and Windows 10.
- docs: Where this documentation file is stored.
- bin: Sample scripts for making use of the library.
- Node_modules: Stores the node npm (Node Package Manager) libraries used by this library
There are also a few files in the {library root} folder. These are part of node, and should not be changed.
Getting started / Operating Intent
Getting started with the library is very simple. You must:
- Create the settings.json file in the config folder
- Edit your settings.json with username, passwords, and the Chrome executable path
- Run the UiPathAPIAuthenticatorCtl.js script to create your security information
- Make REST API Calls using the Authorized methods
The intent of this library is that once you have generated settings.json, your programs execute a script in {library root}/bin. The script is coded to take parameters from your application, format them into a REST request, and call the UiPathAPIAuthenticator.js library to make a "refresh safe" request. The HTTP response data is output to standard out, and can be captured by your calling application, to parse out result data.
Suppose we want to add a queue item. That requires us to tell the script
- Name of the target queue
- Priority of the new Queue Item
- The specific_content for the queue item
To do this:
- Create a Javascript file named AddQueueItem.js
- Add code to fetch three command line arguments, one for each of the data passed in. If for example your queues might be located in a different folder, you will need to add a parameter for the folder.
- Create the headers and body json. The library uses the Axios package to make the calls, and follows the axios format.
- Call the appropriate Verb method (AuthorizedPost, AuthorizedGet, etc.).
The library handles reading your settings.json, making the request, catching a 401 response code, refreshing the tokens, updating the settings.json, and retrying your request.
The library comes with a number of scripts in the {libraryroot}/bin folder.:
- UiPAthAPIAuthenticatorsCtl.js to build the settings.json file initially.
- FetchQueues.js to demonstrate a GET request, that pulls all QueueDefinitions in your Default folder.
- AddQueueItem.js to demonstrate a POST request, that adds a QueueItem to the named queue, with specified priority and specific_content.
Detailed walk through of running the scripts
UiPathAPIAuthenticatorCtl.js
Step 1: Create settings.json
-
In the config folder, make a duplicate copy of either the Mac or Windows settings file found in the config folder.
-
Rename the duplicate to settings.json. The library will read and write the settings.json file.
Step 2: Fill in settings.json information
Edit the settings.json file. I use Visual Studio Code, a free Microsoft editor. You can use VS Code, Notepad (Windows) or TextEdit (Mac).
When you edit the initial file, there are 13 properties predefined. Properties with no current value start with the empty string “” as the value. You need to fill in the first 4 properties:
- ChromePath
- OrchestratorUsername
- AccountPassword
- PlatformPassword
{
    "ChromePath": "/Applications/Google Chrome.app/Contents/MacOS/Google Chrome",
    "OrchestratorUsername": "youremail@example.com",
    "AccountPassword": "account.uipath.com password",
    "PlatformPassword": "platform.uipath.com password",
    "CodeChallenge": "",
    "CodeVerifier": "",
    "AuthorizationToken": "",
    "RefreshToken": "",
    "AccessToken": "",
    "IdToken": "",
    "APIAccessToken": "",
    "OrchestratorAccount": "",
    "OrchestratorServiceInstance": ""
}
Notes:
- It is important that you use the empty string for values that have not been filled in. The scripts use the empty string as an indicator that the value is not filled in, and needs to be generated.
- Your account.uipath.com, and platform.uipath.com accounts might have the same password (If you set it up that way), or they might have different passwords. Both passwords are required.
- You might have installed Chrome in a different place from the default values. If that is the case, make sure that you have the correct path to Chrome or the script will not be able to launch Chrome in the GenerateAccess Token step, and the script will crash with an error.
- Finally, the OrchestratorAccount and OrchestratorServiceInstance are filled with Objects, not just the name as you might have done manually. The library handles generating the objects. Leave them blank, or delete the values you may have stored there from manual configuration.
Save settings.json with the four values filled in.
Step 3: Run the UiPathAPIAuthenticatorCtl.js script to create your security information
- Open a Terminal (Mac) or Command Shell (Windows)
- Double check “{library root}/config/settings.json” has the required four pieces of information filled in.
- Change the working directory to “{library root}/bin
- Run the command
node UiPathAPIAuthenticatorCtl.js
- Change the working directory to {library root}/config folder”
- Dump the contents of the settings.json file to the console. All the fields are filled in.
Notes:
- While running, the script will open Google chrome, and log in to your account.uipath.com as a part of the process. Do not be alarmed when Chrome opens, and logs you in.
- This script detects the “” values in settings.json. If the property already has a value, the script will skip that step.
Run FetchQueues.js
Notes:
- This script assumes the settings.json file is filled in, and correct. The API Access Token can be valid or expired.
- The script uses the AuthorizedGet function of the Deale Tech library
- This script requires no parameters.
- It automatically refreshes the tokens when a HTTP status = 401 is detected.
Process:
- Open a terminal (Mac) or Command Shell (Windows)
- Double check “{libraryroot}/config/settings.json” has the required security information fully filled.
- Change the working directory to “{libraryroot}/samples”
- Run the command:
node FetchQueue.js
- Your QueueDefinitions should print to the console.
- Wait 24 hours, and try the same API Call through POSTMAN, and you will receive 401 – Unauthorized.
- Run step 4 again, and it will succeed, and your security information will be updated in settings.json.
Run AddQueueItem.js
NOT CODED YET.
All Comments welcome!
See a typo? Say something.
Bad words not make sense? Say something.
Have topics you would like to see a post about? You got it. Say something.
— M